手把手打造Win10酷炫好用的终端
2025-08-07
参考文章:
① WindowsTerminal + oh-my-posh 终端美化教程
手把手打造Win10酷炫好用的终端
一、前言
本人是一个数字IC设计方向的学生,最近在研究UVM验证平台,在网上找到的资料基本上都是用Questasim(用起来跟Modelsim基本一样)或VCS,在终端中运行写好的脚本进行仿真。在学习的过程中经常看到别人的终端非常的酷炫且好用,所以咱也来学习配置一下好看且好用的终端,下面是我配置的过程。
二、工具准备
Windows Terminal:在Microsoft Store中一键下载Power Shell 7WSL2:Windows Subsystem Linux2,Windows中的linux子系统,可以理解成比虚拟机方便的虚拟机
三、Windows Terminal基础设置
3.1 字体设置
在Github中下载nerd-fonts,这个字体可以有效避免安装oh-my-posh后产生乱码
安装步骤:点击链接\rightarrow点击Release\rightarrow点击Show all assets\rightarrow点击FiraCode.zip下载\rightarrow解压\rightarrow选中所有.ttf文件,右键选择安装
看不懂安装步骤的可以看参考文章①
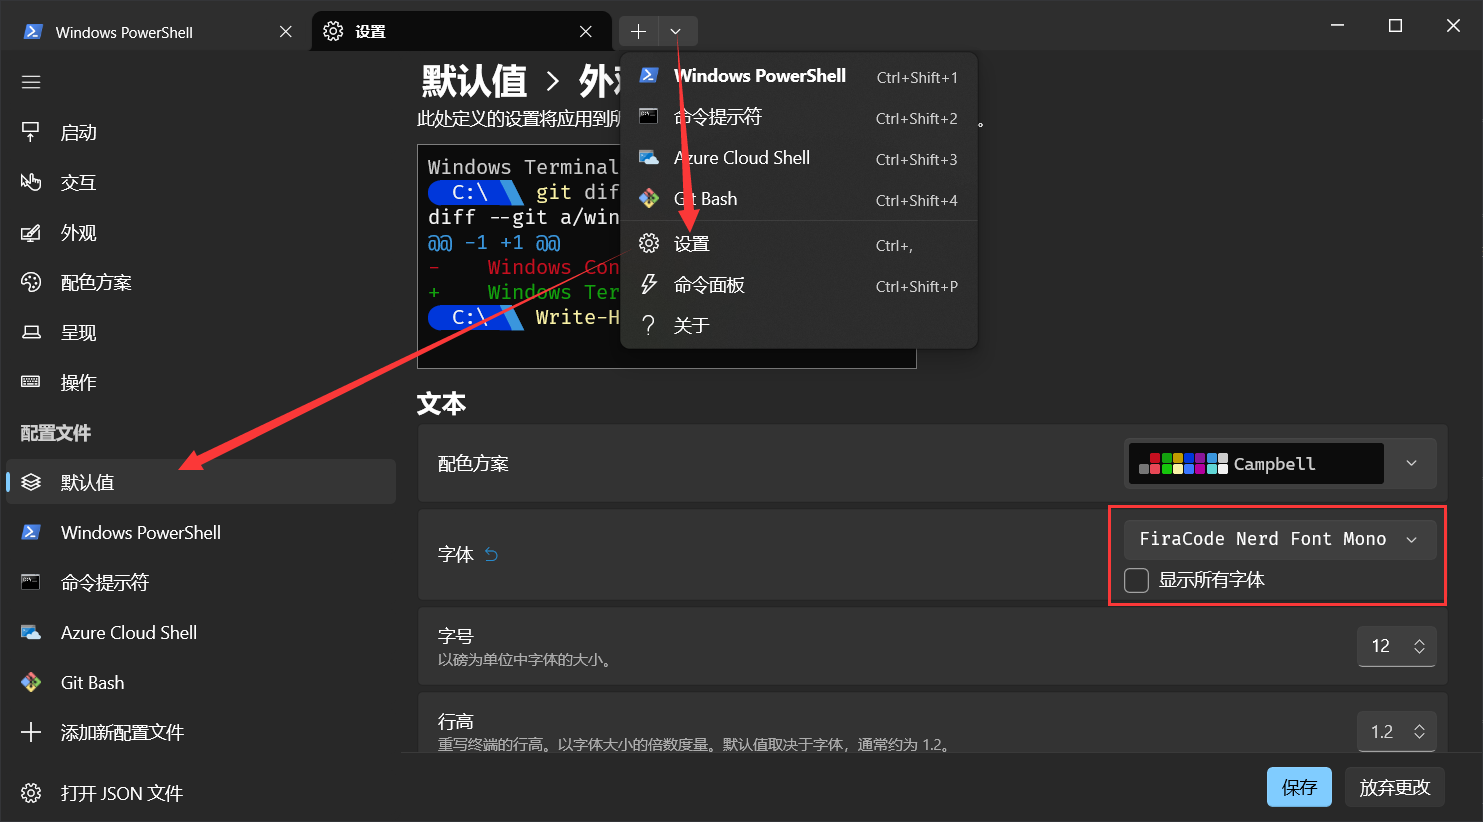
安装完字体后,打开终端,找到设置\rightarrow默认值\rightarrow外观\rightarrow字体\rightarrow选择FiraCode Nerd Font Mono
3.2 设置Windows Terminal背景透明度
这个按照个人喜好来选就行,与字体在同一界面
3.3 安装Power Shell7
左下角搜索
powershell,点击运行,在命令行输入$psversiontable或$host后按下回车,终端会打印出当前Power Shell的版本号,一般默认都是Power Shell5,接下来我们安装Power Shell7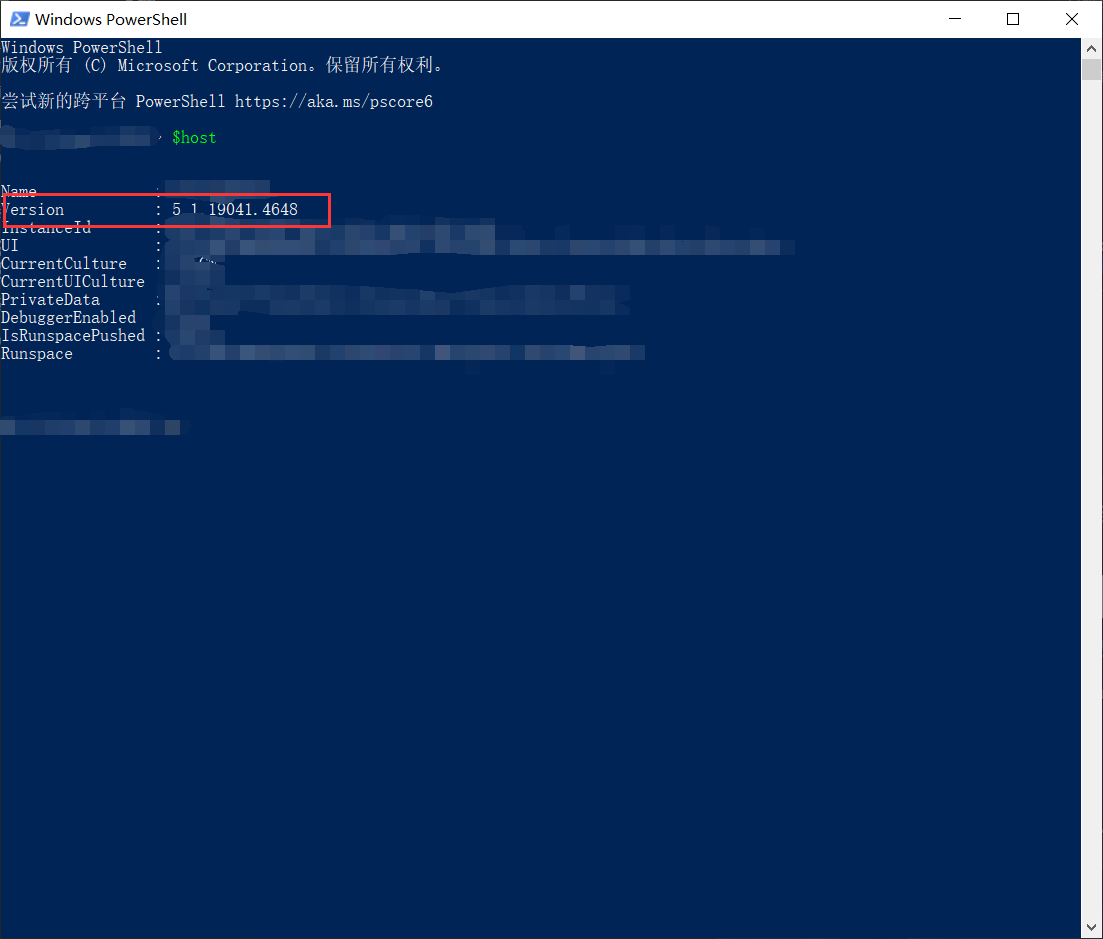
点击跳转到Power Shell 7 Github仓库release界面,在
7.4.3版本下找到PowerShell-7.4.3-win-x64.msi,点击就可以下载下载完成
.msi文件后,双击运行该程序,选择好Power Shell 7的安装位置后一路点击Next就行(本人没有研究哪些选项有啥作用,感兴趣的可以看一下)安装完成后,在
开始菜单中找到PowerShell 7 (x64),单击运行,输入$host后回车查看版本号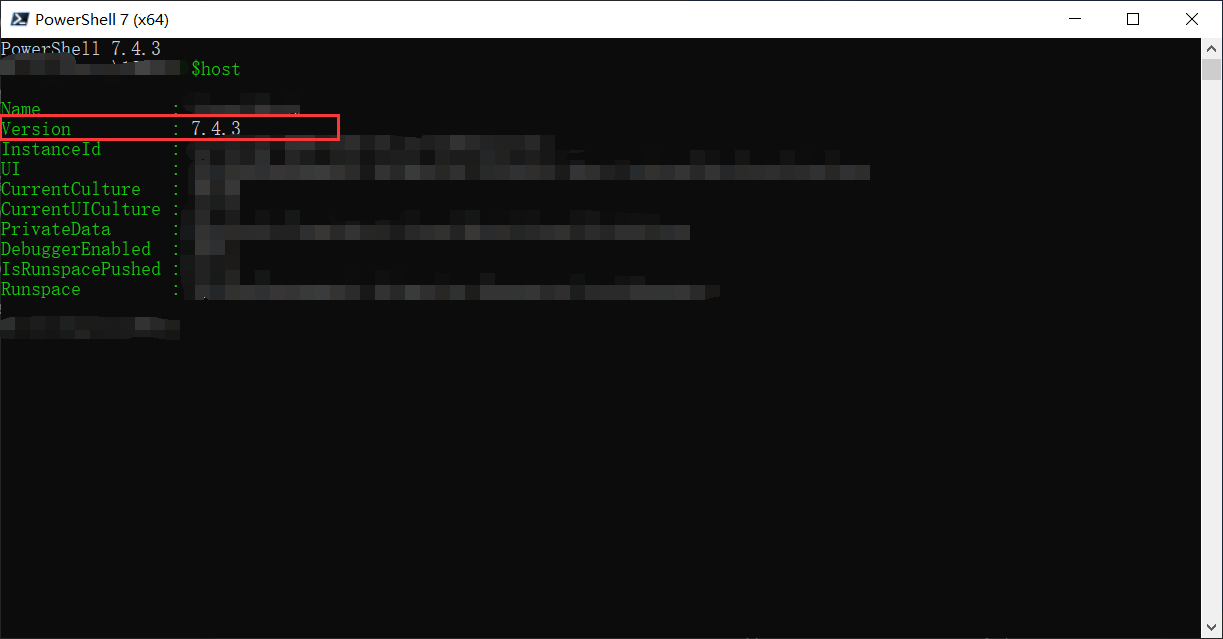
至此
Power Shell 7安装完成!在
Windows Terminal(终端)中,将Power Shell 7设为默认启动终端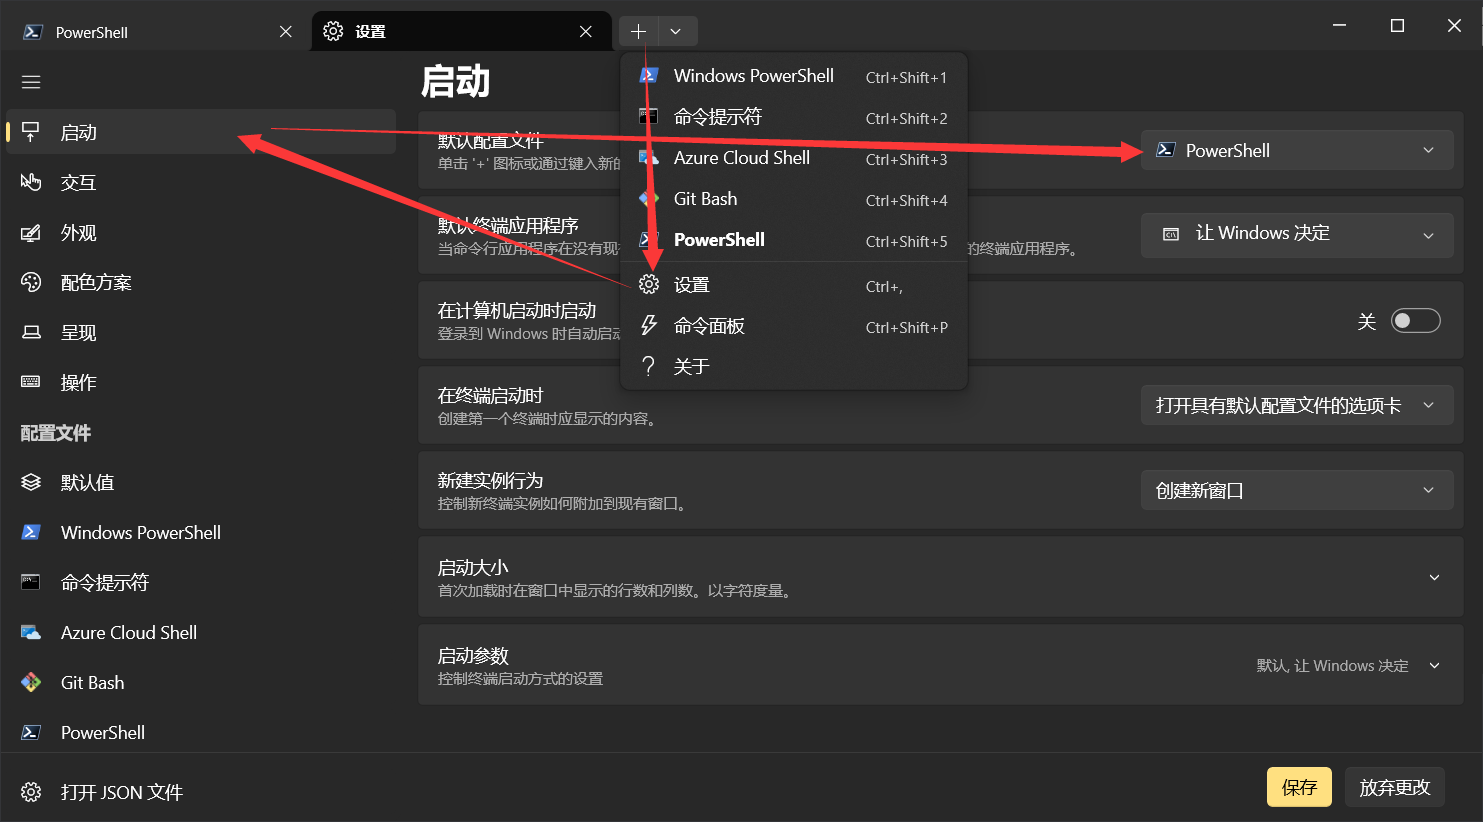
3.4 Power Shell命令行美化
请以管理员身份运行Windows Terminal(终端),方法是在左下角搜索Windows Terminal(终端),右键选择以管理员身份运行
3.4.1 安装oh-my-posh
点击打开
oh-my-posh官方仓库release界面,找到最新版本下的install-amd64.exe,点击下载安装程序双击安装程序,选择为当前用户安装,然后选择安装位置,一路
next,就安装好了以管理员身份运行
Windows Terminal(终端),运行oh-my-posh init pwsh --config "$env:POSH_THEMES_PATH\zash.omp.json" | Invoke-Expression启动oh-my-posh,此时使用的主题是zash输入
Get-PoshThemes,回车,终端会打印此时可以选择的所有主题,同时会打印主题文件所存放的路径。如果有喜欢的终端主题,可以将Example中的jandedobbeleer修改为喜欢的主题名字,回车运行即可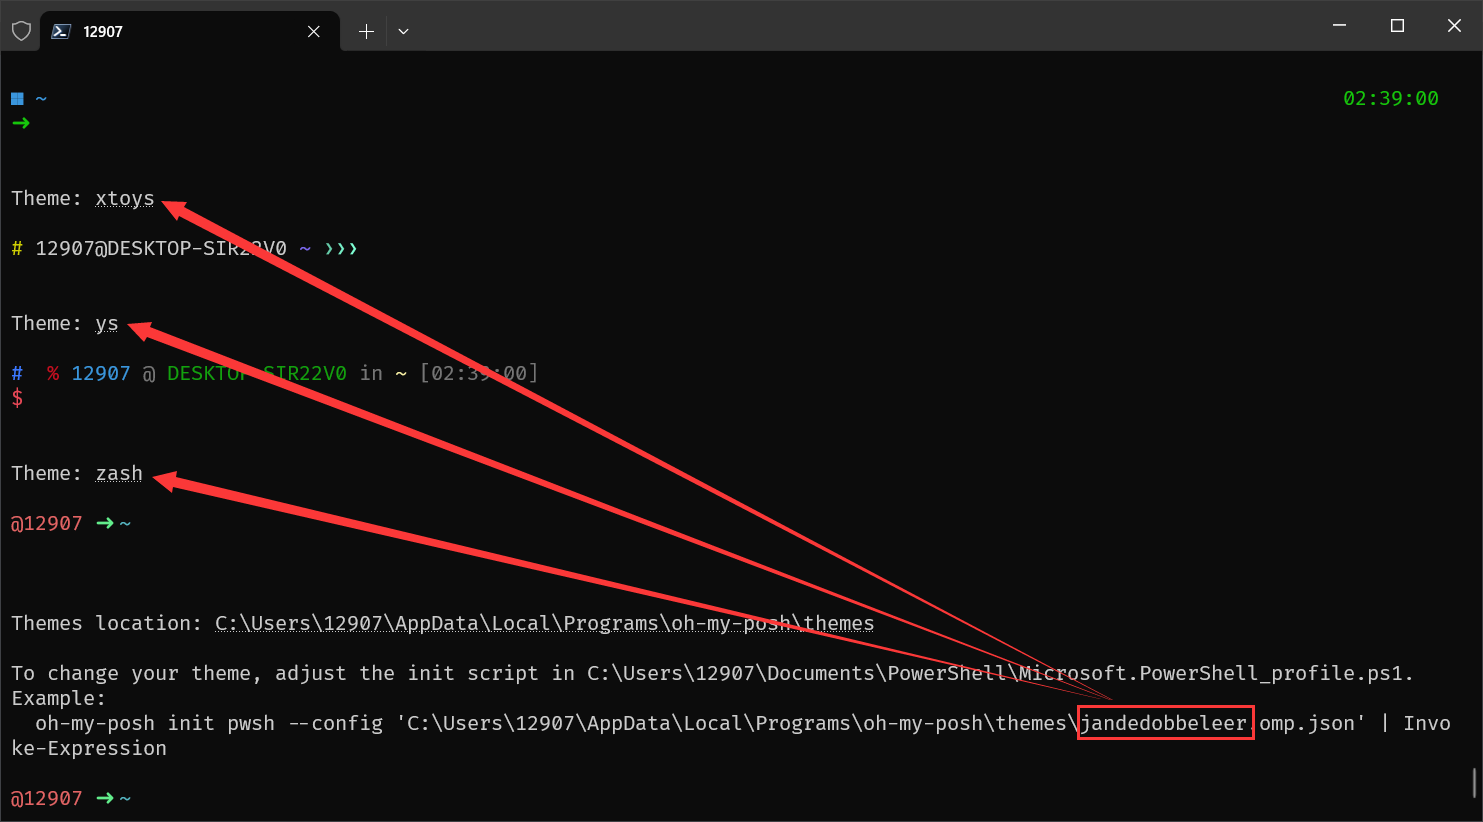
如果想每次启动终端时自动启动
oh-my-posh,那么可以code $PROFILE,输入Example中的命令,将命令中jandedobbeleer修改为自己想要的主题名字就行,ctrl + s保存,这样每次启动就是oh-my-posh了
四、安装WSL2
# .cshrc
# Uncomment the following line if you don't like systemctl's auto-paging feature:
# User specific aliases and functions
alias gv 'gvim'
alias g 'gvim'
alias la 'ls -a'
alias .. 'cd ..'
alias vc 'gvim ~/.cshrc'
alias sc 'source ~/.cshrc'
alias cd 'cd \!*; ls'
alias code '/mnt/d/VSCode/Code.exe'
# cd() { builtin cd "$@" && ls; }
bindkey '\e[1~' beginning-of-line # Home
bindkey '\e[3~' delete-char # Delete
bindkey '\e[4~' end-of-line # End
bindkey "^W" backward-delete-word # Delete
bindkey -k up history-search-backward # PageUp
bindkey -k down history-search-forward # PageDown
set cr = "%{\e[31m%}"
set cg = "%{\e[32m%}"
set c0 = "%{\e[0m%}"
# Set some variables for interactive shells
#if ( $?prompt ) then
# if ( "$uid" == "0" ) then
# set prompt = "%B%U%n%u@%m.$cr%l$c0%b %c2 %B%#%b "
# else
# set prompt = "%B%U%n%u@%m.$cg%l$c0%b %c2 %B%%%b "
# endif
#endif
set prompt="%n@%m:%~%#"
setenv LSCOLORS ExGxFxdxCxegedabagExEx
setenv CLICOLOR yes
setenv GREP_OPTIONS --color=auto
set autolist
set correct = cmdset noclobber
source ~/.csh_synopsys
sudo ip link add vmnic0 type dummy
sudo ip link set vmnic0 addr 00:15:5d:f2:bc:d8 # .bashrc
# Source global definitions
if [ -f /etc/bashrc ]; then
. /etc/bashrc
fi
# Source Synopsys EDA Settings
if [ -f ~/.bash_synopsys ]; then
. ~/.bash_synopsys
fi
# Uncomment the following line if you don't like systemctl's auto-paging feature:
# export SYSTEMD_PAGER=
# User specific aliases and functions
alias gv="gvim"
alias g="gvim"
alias la="ls -a"
alias ..="cd .."
alias vb="gvim ~/.bashrc"
alias sb="source ~/.bashrc"
cd() { builtin cd "$@" && ls; }
export PS1='[\u@\h `pwd`]\$'